
Safe Pressure Canning for Beginners
That first rattling lid can make even a confident home cook second-guess everything. If you are learning safe pressure
I sometimes use affiliate links in my content. This will not cost you anything but it helps me offset my costs to keep creating new
Last updated: May 7, 2026
By Diane Devereaux | The
Pressure
Although a pressure canner is primarily associated with low-acid foods, it may also be used for certain high-acid foods, such as fruits and tomatoes, using lower pressure and shorter processing times. Understanding when and why to use pressure
Why safe pressure canning matters
A lot of beginner confusion comes from mixed messages. Someone says their grandmother oven-canned green beans for decades. Another person swears by open-kettle
Safe pressure
A sealed jar is not automatically a safe jar. That one truth changes how you approach the entire craft.
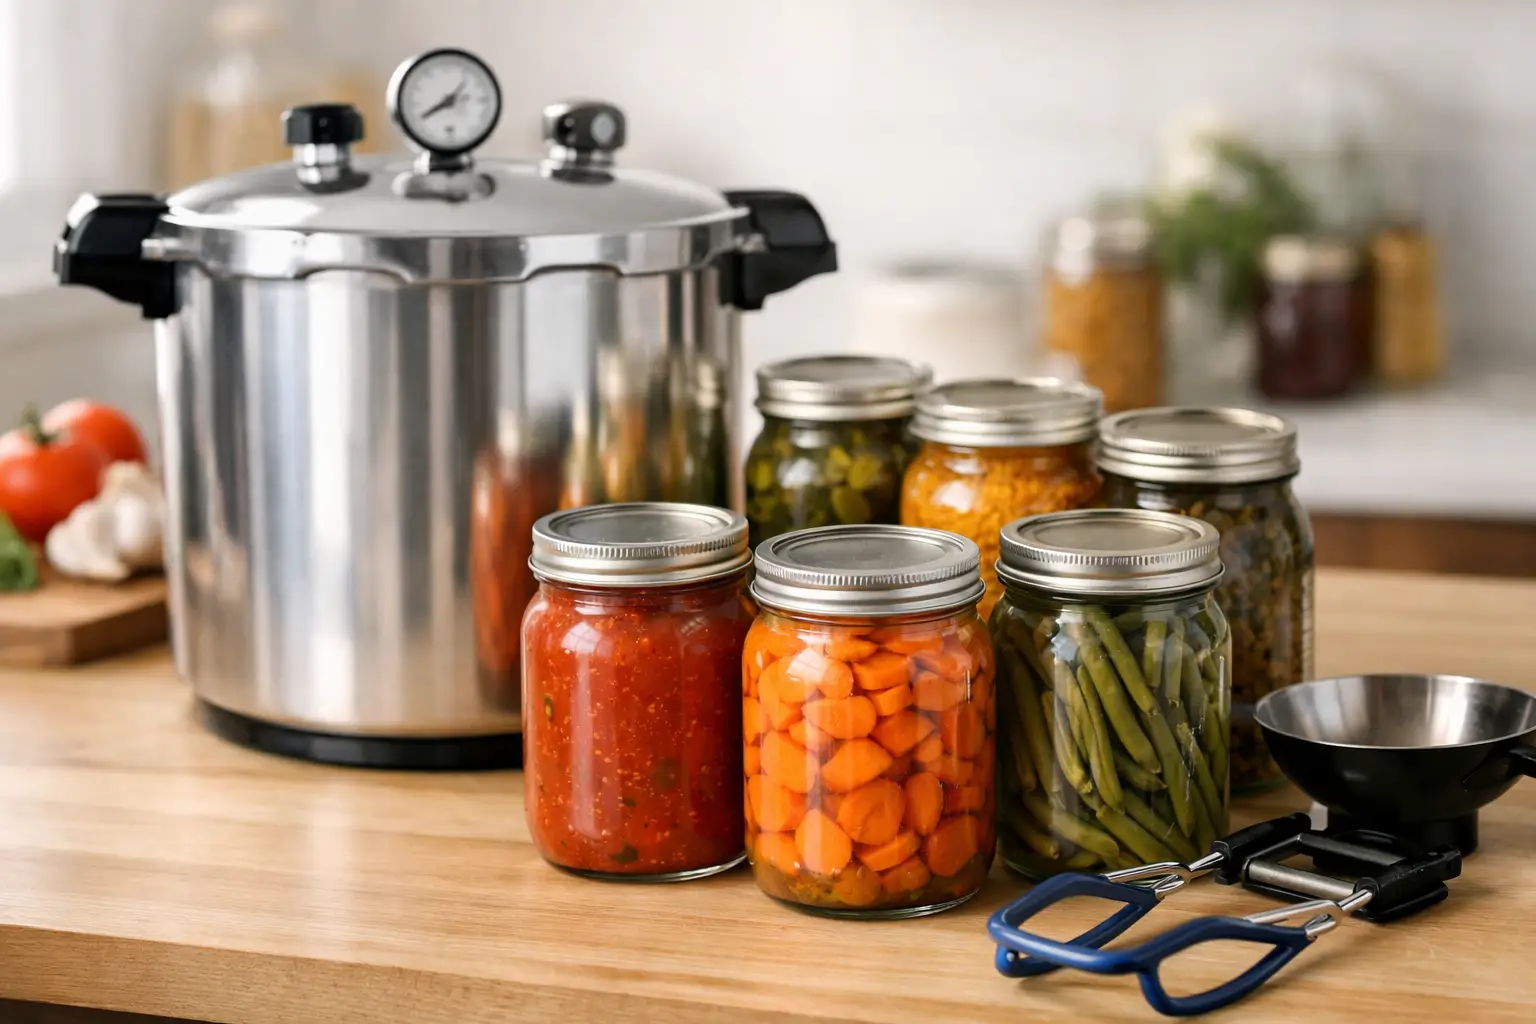
What you need before your first batch
You do not need a huge homestead kitchen to start, but you do need the right equipment. A true pressure canner is non-negotiable. A pressure cooker is not automatically the same thing. Some multi-cookers and electric appliances are excellent for meal prep, but they are not approved substitutes for pressure
You will also need
Reliable equipment matters, but reliable does not always mean brand new or expensive. Many older pressure canners found at estate sales or passed down through family are built exceptionally well and can continue performing safely for decades when properly maintained. What matters most is understanding how your specific canner operates, ensuring all parts are in good working order, and following safe processing guidelines.
The basic pressure canning process
Once your food is prepared, you fill the jars, remove air bubbles, wipe the rims, apply lids and bands, and place the jars on the rack inside the canner with the recommended amount of water. Then the real process begins.
First, you vent the canner. This step matters more than many beginners realize. Venting allows steam to push out the air inside the canner so the internal temperature matches the pressure correctly. Skipping or shortening this step can affect the safety of the entire batch.
After venting for the full recommended time, you apply the weight or close the petcock according to your canner instructions and allow the canner to come up to pressure. Only when the correct pressure is reached do you begin timing the process.
Holding steady pressure is part of the skill. Too low is unsafe. Too high can lead to liquid loss and food quality issues. It takes practice to manage your stove setting, and that is normal. The goal is consistency, not panic.
When the timed process is complete, turn off the heat and let the canner return to zero pressure naturally. Do not rush it. Do not force-cool the canner. Opening it too soon can lead to seal failure, siphoning, or shocking the glass jars causing them to crack or shatter.
Common beginner mistakes and how to avoid them
The biggest mistakes are usually simple, and that is good news because simple mistakes can be prevented.
One of the most important parts of home
The second common mistake is ignoring altitude. Water boils at lower temperatures as elevation increases, which affects how your canner performs. If you live above sea level, you may need to increase pressure based on your altitude and your canner type. This is not optional.
Another frequent problem is overpacking jars. Beginners often want to maximize every inch of space, but crushed food, improper headspace, or overly thick mixtures interfere with good results. Follow the recipe and give the food room to process as intended.
Then there is the temptation to judge doneness by sound or appearance. A quiet canner is not necessarily wrong, and a noisy one is not necessarily right. Learn how your specific canner behaves and rely on the pressure reading and tested directions, not guesswork.
Choosing the right foods for your first pressure canning session
If you are brand new, start with something straightforward. Plain vegetables, broth, or a simple meat stock are often easier first projects than mixed dishes. They help you learn the mechanics of jar filling, venting, pressure control, and cooling without managing too many variables. When I teach students in a classroom, I use my Basil Diced Tomatoes
Once you understand the foundational steps, enjoy preserving soups and meals in a jar which are excellent pantry staples. Just know starting simple is not a step backward. It is how strong skills are built.
What to check after processing
When the jars have cooled undisturbed for the recommended time, remove the bands and check the seals. The lid should be concave and firmly attached. Then inspect the jar itself. Look for proper liquid level, normal color for the product, and no signs of food trapped under the lid.
Label every jar with the contents and date. Store jars without the bands in a cool, dry, dark place. Keeping the bands off helps you spot a failed seal later rather than assuming the jar is secure because the ring is holding it in place.
If a jar did not seal, refrigerate it and eat it within a week as you would any leftover, or reprocess it using a new lid and ring.
Building confidence with safe pressure canning for beginners
Confidence does not come from one perfect batch. It comes from repetition, observation, and a willingness to learn the system. Every canner has a personality. Every stove behaves a little differently. The more often you practice, the more natural the process becomes.
This is where a no-nonsense approach matters. Keep notes on what you canned, the pressure used, your altitude, how long it took your canner to vent and pressurize, and anything unusual you noticed. Those notes become part of your preparedness toolkit.
At The
A well-stocked pantry is built by matching the right preservation method to the right food. Pressure
People Often Ask
A pressure cooker and a pressure canner are not always the same appliance. While some modern electric canners are specifically tested and approved for pressure canning, many countertop pressure cookers and multi-cookers are designed only for cooking food, not preserving it for shelf storage. Always verify that your appliance is intended and tested for pressure canning before using it for low-acid foods.
After jars cool undisturbed, the lid should appear slightly concave and remain firmly attached when pressed in the center.
About the Author:
Diane Devereaux, The