
Check this out!
Pressure Canning Mushrooms
Mushrooms are one of the most versatile foods you can bring into your kitchen and your pantry. From the earthy richness of portobellos to the delicate sweetness of oyster mushrooms, these edible fungi transform simple dishes into gourmet meals. Toss them into pasta, scatter them over pizza, pan-fry them for a steak topping, or stir them into soups and sauces—mushrooms always add depth, flavor, and nutrition.
(I sometimes use affiliate links in my content. This will not cost you anything but it helps me offset my costs to keep creating new canning recipes. Thank you for your support.)
By Diane Devereaux | The Canning Diva®
Last updated: September 1, 2025
Key Takeaways
- It takes about ½ pound of mushrooms to fill one pint jar, whether sliced or whole.
- Home-canned mushrooms save money, cut waste, and avoid preservatives found in store-bought versions.
- Cultivated and certain wild mushrooms can be safely preserved when you know the species.
- Mushroom broth left over from processing can be canned and used in soups, gravies, or risottos.
Cultivated mushrooms come in a delightful array of flavors and textures, from the earthy richness of portobellos to the delicate sweetness of oyster mushrooms. Mushrooms are incredibly versatile and can be incorporated into a wide range of dishes, from pastas and pizza toppings to innovative stir-fries, soups, and pan fried to enjoy on top of a steak. Experimenting with different mushroom varieties can inspire your creativity in the kitchen and lead to exciting culinary creations.
Why Mushrooms Deserve a Spot in Your Pantry
Mushrooms are not only tasty but also packed with essential nutrients. They are a good source of protein, fiber, vitamins (such as B vitamins and vitamin D), and minerals (including selenium, copper, and potassium). Adding mushrooms to your meals can help boost the nutritional value of your diet in a fun and flavorful way. Incorporating mushrooms into your diet can be a fun, flavorful, and rewarding experience that offers a host of culinary, nutritional, and environmental benefits.
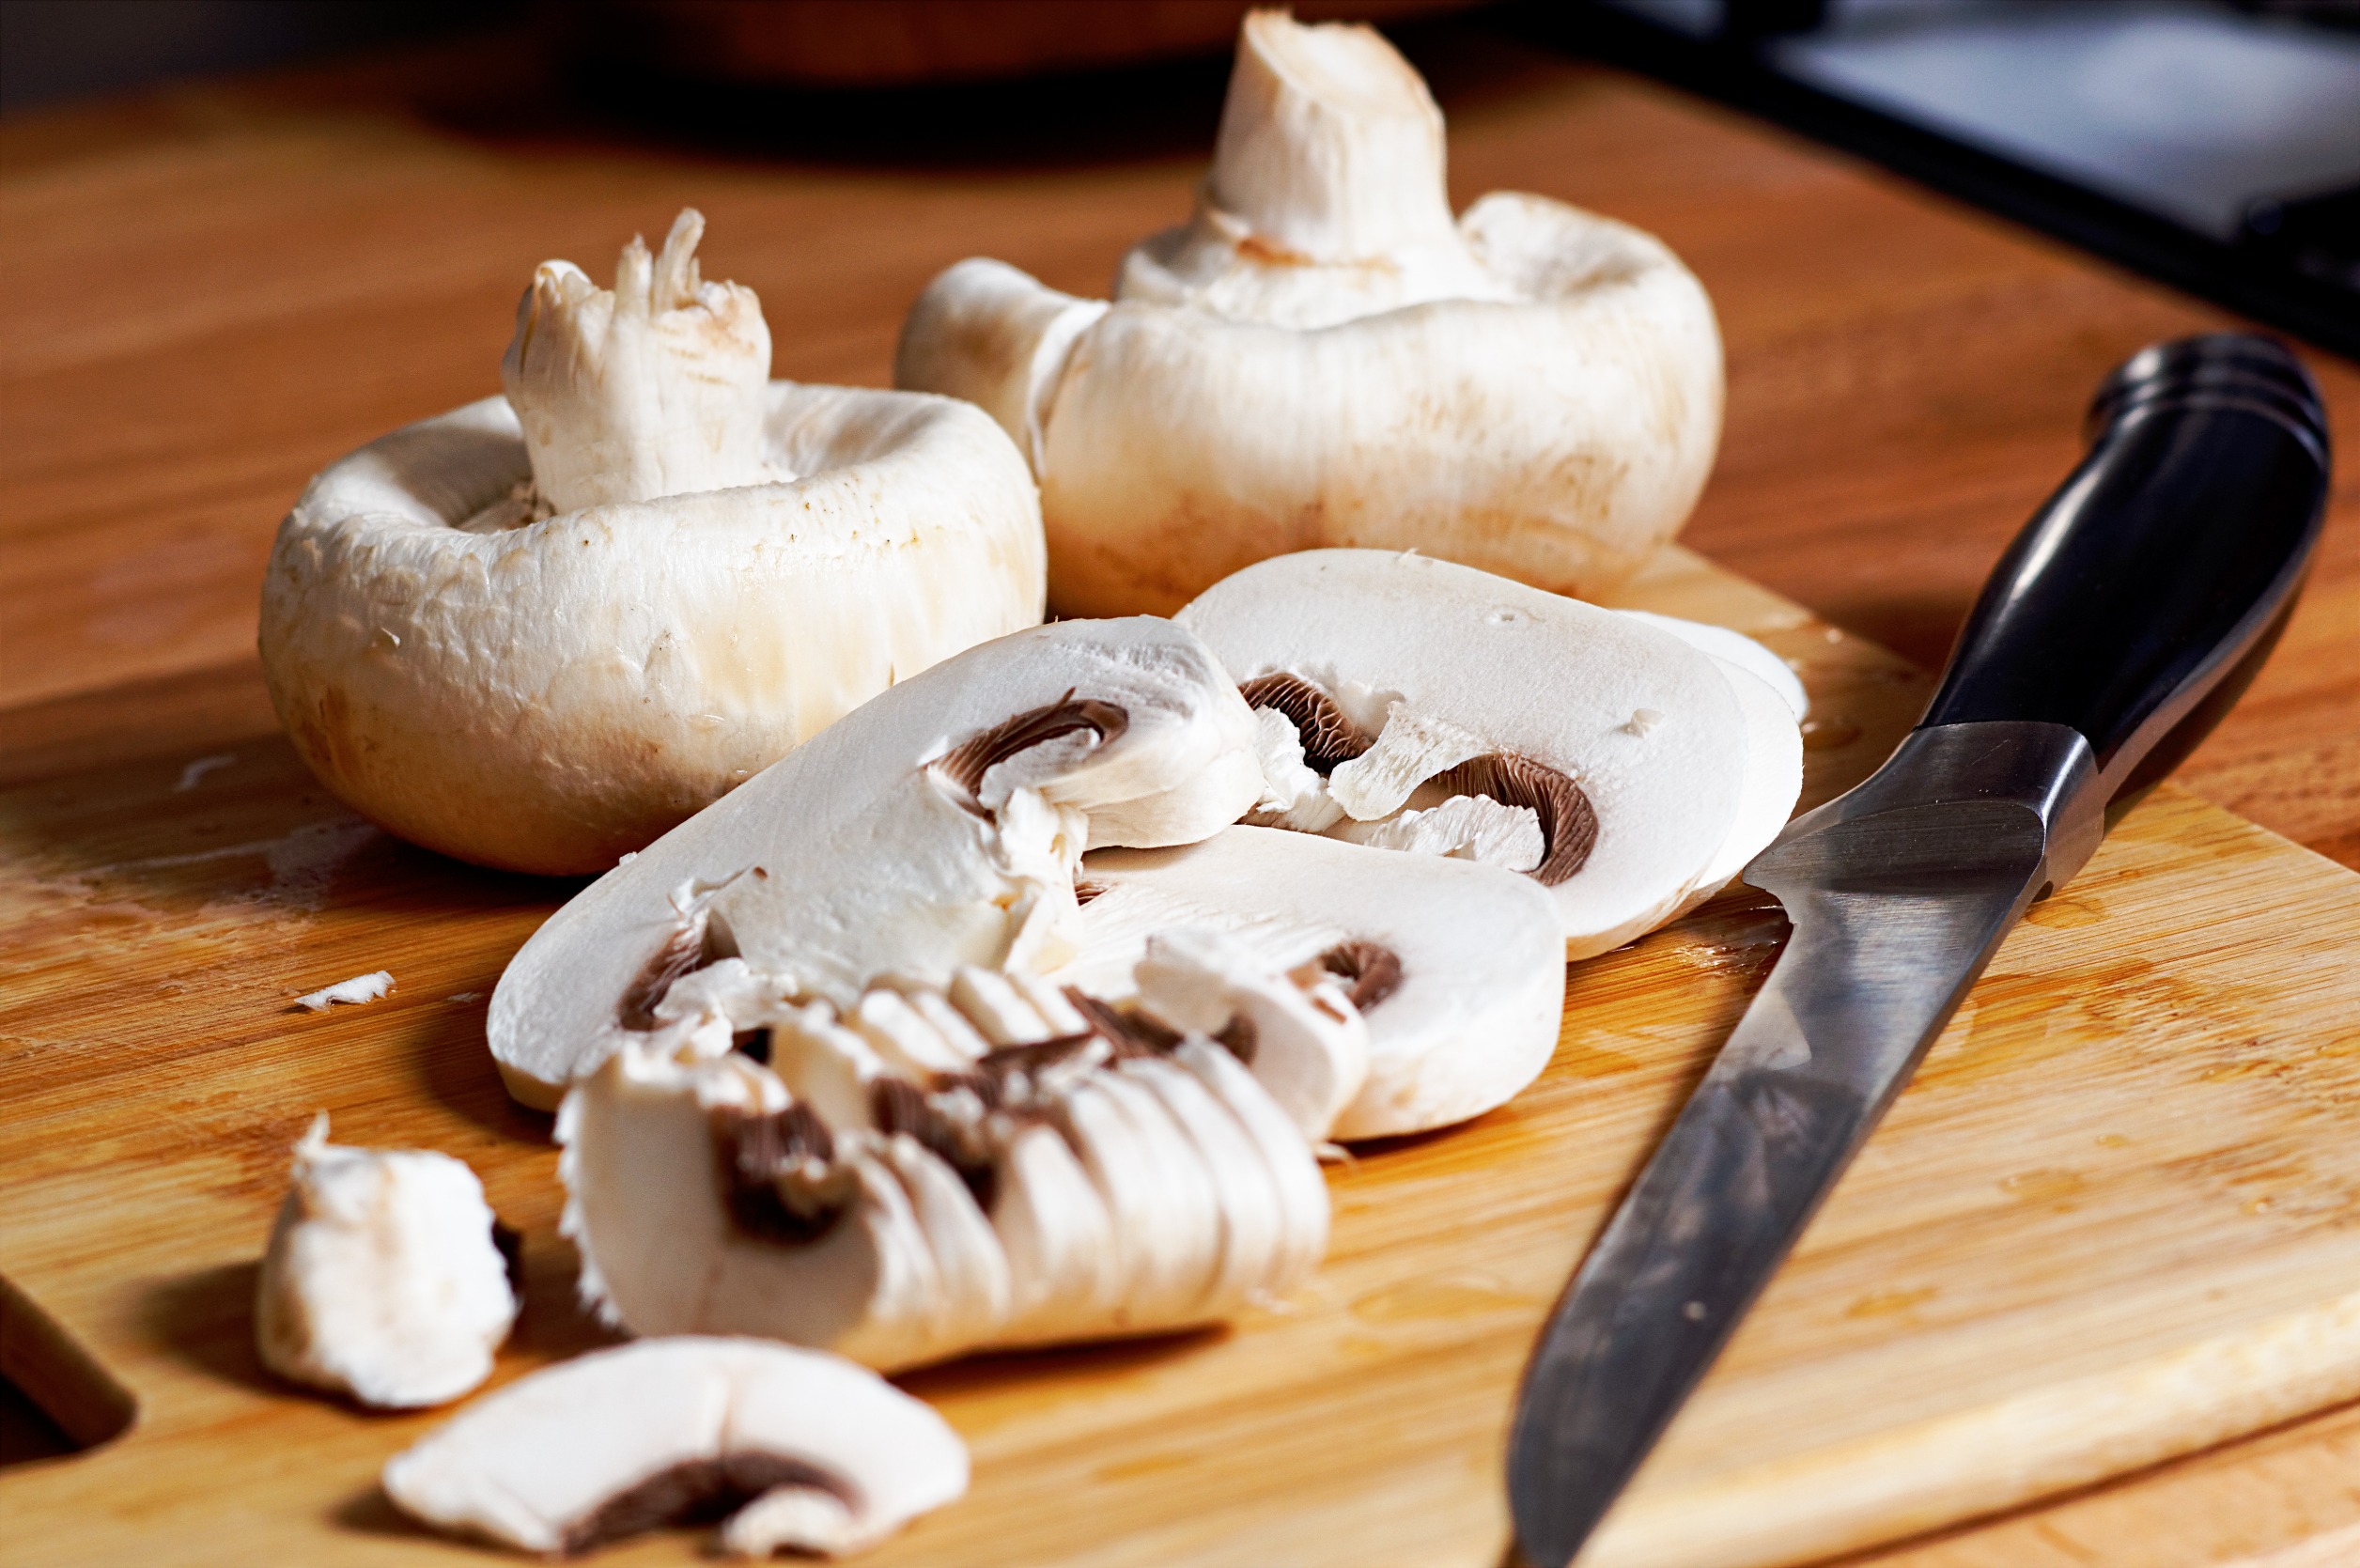
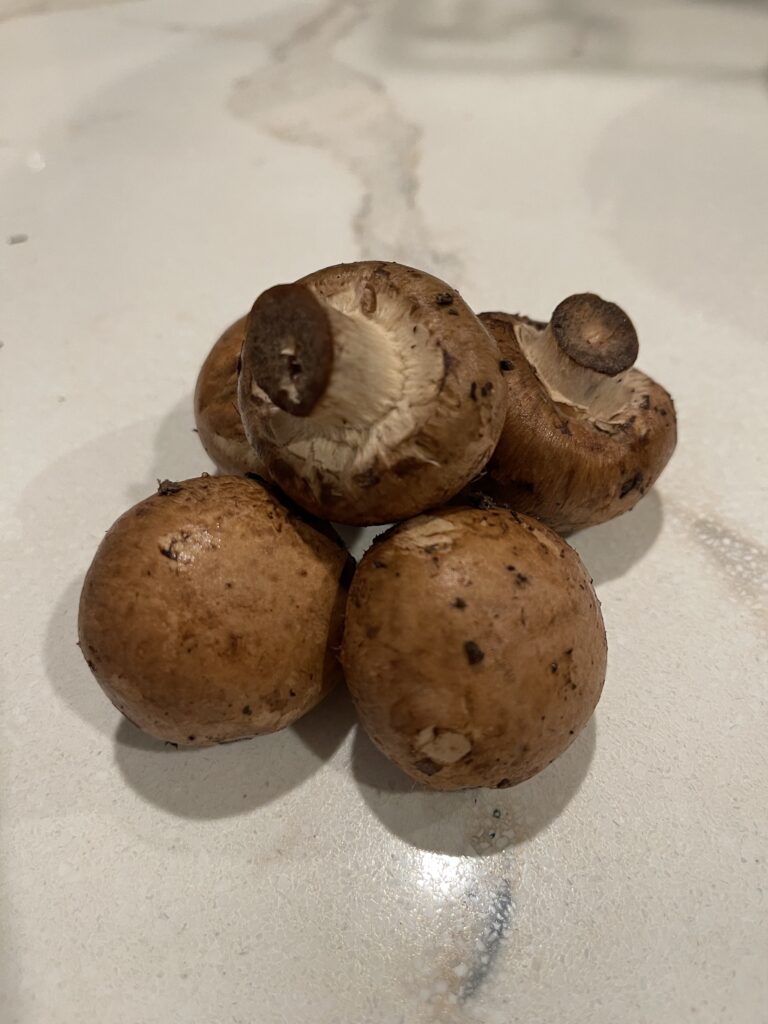
Home canners can preserve the mushrooms whole or sliced. Smaller button mushrooms fit beautifully in a jar whole, while larger mushrooms like baby portobella and white round are better sliced. Also, when canning cultivated mushrooms, salt is purely optional. And depending on how you intend to use the mushrooms after they are canned, you may add additional seasonings to each jar. Feel free to experiment with fun spices such as black peppercorn, dried oregano, or red pepper flakes to each jar.
Fun fact: Across the globe, foragers have relied on mushrooms as a staple food source for centuries, often preserving them as a way of life.
Canning Wild Mushrooms
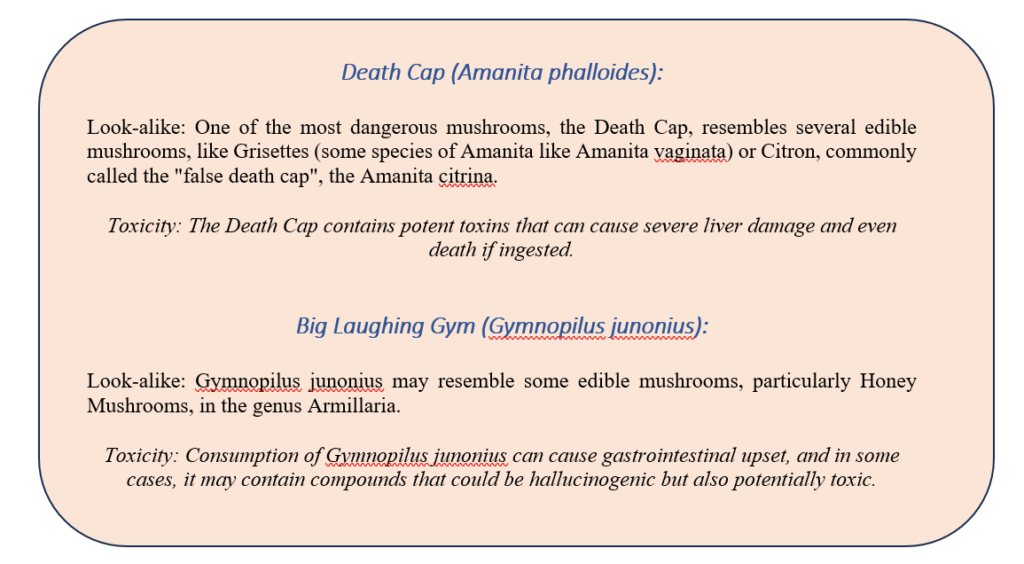
Now there is debate on whether or not to home can wild mushrooms. What is always missing from the “recommendations” or “disclaimers”, or form the lovely bolded print often starting with words like “caution”, are none of these notices or cautions tell you ‘why’ it’s allegedly ‘unsafe’ to preserve wild mushrooms.
What it boils down to is no one wants to be held responsible for an individual foraging a toxic mushroom, preserving it in a jar, and getting sick. So know what you are picking before consuming it.
In the wild there are many look-alike mushrooms. Here are a couple examples:
Foraging Wild Mushrooms
Across the globe, there are many successful foragers who use this time-honored method of gathering food on a daily basis, and often as a way of life. I have no desire to impugn their knowledge, or expertise, so if you know what you are doing and which species you are gathering in the wild, I am confident you will successfully preserve them in a jar using the below method.
One of the most popular wild mushrooms is Maitake, the Hen of the Woods Mushroom, or technically known as Grifola Frondosa. Outside of ensuring they are clean and free from insects and debris; these make excellent mushrooms for home canning. A popular blog, Health Starts in the Kitchen, has done an excellent job showing people how to safely preserve Hen of the Woods by way of canning.
For those of you interested in having mushrooms on your pantry shelves to create meals, add to pizza or sauté atop a steak, or simply add to soups and sauces, here are simple instructions so you may preserve mushrooms any time of the year.
Serving Ideas
- Toss mushrooms into weeknight pasta dishes.
- Use them as a pizza topping straight from the jar.
- Add to stews and soups for rich flavor.
- Pan-fry with butter and garlic for a quick steak topper.
Canning your own mushrooms means you’ll always have a preservative-free, nutrient-packed ingredient ready to go. Plus, you’ll save money compared to buying commercial cans.
Pressure Canning Mushroom Recipe
Makes approx. 4 quarts, 9 pints or 18 half-pints
When planning to preserve mushrooms in a jar, we use weight to determine how much to purchase and how many jars to have ready. It takes approximately a 1/2 pound of fresh whole mushrooms to fill one pint jar, whether sliced or whole. So to yield 9 pints, you will need to have 5 pounds of mushrooms.
Ingredients
- 5 pounds mushrooms
- water
- 9 teaspoons salt (optional)
Instructions
- I don’t presoak my mushrooms from the store. I simply rinse them, or brush them with a dry cloth to remove debris, then cut the base of the stem if warranted. Just be sure they are clean. If the species is larger than button mushrooms, I will slice ¼-inch thick; otherwise I leave the small mushrooms whole.
- Place mushrooms in stockpot and cover with water. Bring to a boil over medium-high heat, stirring often. Boil for 5 minutes.
- If using salt add 1 teaspoon of salt to each pint jar and a ½ teaspoon in each half-pint jar. Next using a funnel and slotted spoon, pack the mushrooms into each jar leaving a 1-inch headspace.
- Using a slotted spoon, add mushrooms into each leaving a 1-inch headspace. Next ladle the mushroom broth overtop the mushrooms being sure to keep the 1-inch headspace. Remove any trapped air pockets and add additional broth if necessary to maintain the 1-inch headspace.
- Wipe the jar rims with a washcloth dipped in vinegar. Add the lids and rings and hand tighten.
- Process in a pressure canner at 10 PSI or according to your elevation and canner type; 45 minutes for pints and half-pints and 65 minutes for quarts.
Recipe Tip: If you happen to have mushroom broth left over and would like to preserve it jars for later use, you may do so. Feel free to process the broth right along with the jars of mushrooms. If you run out of room in the pressure canner and wish to preserve the jars of broth by themselves, feel free to do so at 10PSI or according to your elevation; 25 minutes for quarts and 20 minutes for pints and half-pints.
Have fun storing these delicious and healthy fungi to use throughout the coming years. It will save you money compared to purchasing commercially canned mushrooms and are free from preservatives.
Pressure Canning Mushrooms
Home canners can preserve mushrooms whole or sliced. Small button mushrooms fit beautifully into jars whole, while larger mushrooms—like baby portobellos or white rounds—do better sliced. Salt is purely optional, but you can add flavor by slipping in a few whole black peppercorns, a pinch of oregano, or even red pepper flakes.
Servings
4 quarts, 9 pints or 18 half-pints
servingsPrep time
30
minutesIngredients
5 pounds 5 mushrooms
water
9 teaspoons 9 salt (optional)
Instructions
- I don’t presoak my mushrooms from the store. I simply rinse them, or brush them with a dry cloth to remove debris, then cut the base of the stem if warranted. Just be sure they are clean. If the species is larger than button mushrooms, I will slice ¼-inch thick; otherwise I leave the small mushrooms whole.
- Place mushrooms in stockpot and cover with water. Bring to a boil over medium-high heat, stirring often. Boil for 5 minutes.
- If using salt add 1 teaspoon of salt to each pint jar and a ½ teaspoon in each half-pint jar. Next using a funnel and slotted spoon, pack the mushrooms into each jar leaving a 1-inch headspace.
- Using a slotted spoon, add mushrooms into each leaving a 1-inch headspace. Next ladle the mushroom broth overtop the mushrooms being sure to keep the 1-inch headspace. Remove any trapped air pockets and add additional broth if necessary to maintain the 1-inch headspace.
- Wipe the jar rims with a washcloth dipped in vinegar. Add the lids and rings and hand tighten.
- Process in a pressure canner at 10 PSI or according to your elevation and canner type; 45 minutes for pints and half-pints and 65 minutes for quarts.
Notes
- Recipe Tip: If you happen to have mushroom broth left over and would like to preserve it jars for later use, you may do so. Feel free to process the broth right along with the jars of mushrooms. If you run out of room in the pressure canner and wish to preserve the jars of broth by themselves, feel free to do so at 10PSI or according to your elevation; 25 minutes for quarts and 20 minutes for pints and half-pints.
Did you make this recipe?
Tag @canningdiva on Instagram and hashtag it with #thecanningdiva
Like this recipe?
Follow @canningdiva on Pinterest
People Often Ask
Q: Do mushrooms shrink a lot when canned?
A: Yes, mushrooms lose water during processing, but they retain flavor and texture, making them perfect for cooking later.
Q: Which mushroom varieties are best for canning?
A: Button, cremini, baby portobello, oyster, and Maitake all preserve well. Avoid overripe or spongy mushrooms.
Q: Can I season the mushrooms in the jar?
A: Absolutely! Optional additions like garlic, peppercorns, or herbs make your pantry jars even more versatile.
About the Author:
Diane Devereaux, The Canning Diva®, is a nationally recognized food preservation expert, author, and educator with over 30 years of home canning experience. She’s the author of multiple top-selling canning books and teaches workshops across the U.S. Learn more at TheCanningDiva.com.
