
Check this out!
Home Canning Tuna
Home canning tuna gives you total control over one of the most nutritious proteins you can stock in your pantry. Rich in omega-3 fatty acids, tuna supports heart health by balancing omega-6 levels and lowering LDL cholesterol. Unlike commercial tuna, you decide the sodium content, making this recipe a smart option for low-sodium diets. With each jar, you’ll preserve protein-packed, omega-rich seafood that’s ready for quick meals year-round.
I sometimes use affiliate links in my content. This will not cost you anything but it helps me offset my costs to keep creating new canning recipes. Thank you for your support.
By Diane Devereaux | The Canning Diva®
Last updated: September 5, 2025
Key Takeaways
- Learn how to pressure can fresh tuna at home using either raw pack or hot pack methods.
- Control the sodium content in every jar compared to store-bought tuna.
- Follow step-by-step processing instructions to ensure shelf stability and safety.
- Enjoy 100+ versatile uses for your jars, from sandwiches and salads to casseroles and pasta dishes.
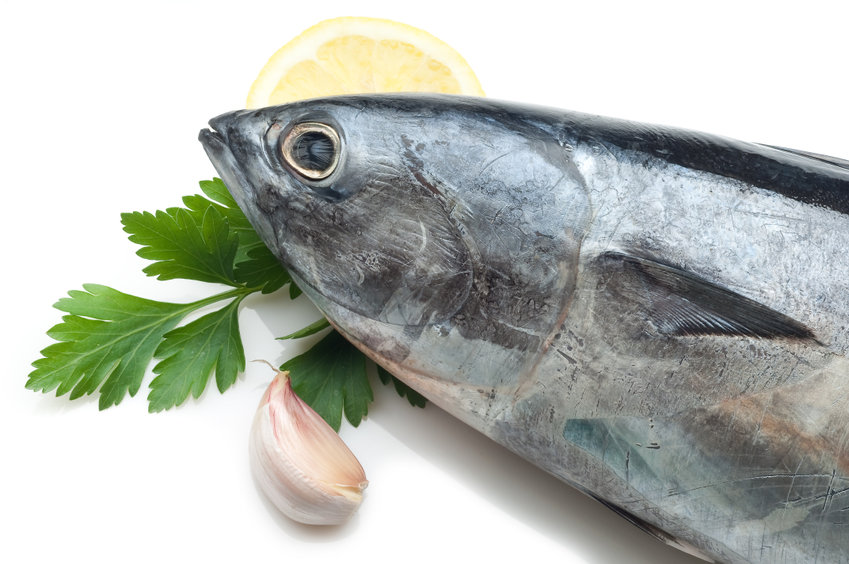
The Health Benefits of Eating Tuna
The high levels of omega-3 fatty acids in tuna fish may help to reduce the level of omega-6 fatty acids and LDL cholesterol that can accumulate inside the arteries of the heart. Studies have shown that eating more omega-3 is associated with reduced rates of cardiovascular disease, including heart attacks.
Healthline shares some information on the health benefits of canned tuna; however, the beauty we have as home canners is we are able to control the level of sodium per jar whereas commercial canners go overboard adding salt. So you if you are on a low-sodium diet, home canning tuna is the best way to enjoy this protein and omega packed seafood.
For home canners, the advantage lies in tailoring each jar to your preferences—whether you prefer a hint of salt, no salt at all, or a splash of oil for richer flavor. This flexibility allows you to stock your pantry with a protein that’s both nutritious and customized.
Serving Ideas for Canned Tuna
Need inspiration? Well, look no further than Taste.com.au scrumptious recipes! In this amazing article, Taste shares 73 recipes using canned tuna. Your home-canned tuna makes excellent tuna salad sandwiches, Mediterranean pasta, tuna patties, and protein-boosted casseroles. The possibilities and flavors are endless! So what are you waiting for? It’s time to plan a fishing trip or schedule a date to head over to your local fish market.
Pressure Canning Tuna Recipe
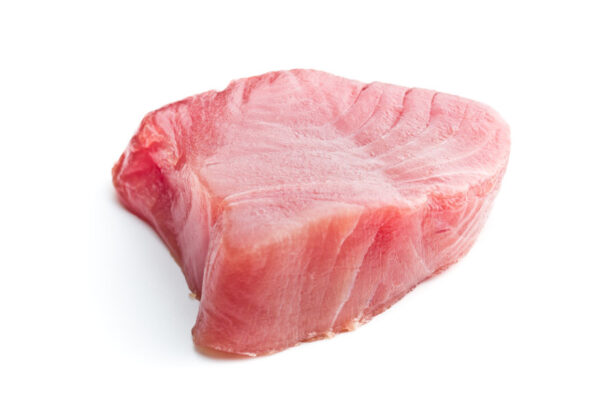
Home Canned Tuna is one of the most satisfying seafood preserves you can add to your pantry. This recipe gives you the choice between raw or hot packing, allowing you to tailor the flavor and texture to your preference. Each jar captures tender, protein-rich tuna without the excess sodium found in store-bought cans. With every batch, you’ll stock shelf-stable seafood ready to transform into tuna salad sandwiches, hearty casseroles, Mediterranean pasta, or simple snacks straight from the jar.
Ingredients
- Fresh tuna, skinned and trimmed
- Salt (optional: 1 teaspoon per pint, ½ teaspoon per half-pint)
- Vegetable oil (optional for hot pack: 1 tablespoon per pint, ½ teaspoon per half-pint)
Instructions
- If raw packing, it is easiest to cut tuna when it is partially frozen. Remove the skin with a sharp knife and scrape the surface lightly to remove blood vessels and discolored flesh. Then proceed to Step 3.
- If hot packing, remove the viscera and wash in cold water. Drain all the blood from the tuna and remove the skin with a sharp knife. Place the cleaned tuna, belly-down on a baking sheet and bake at 350 degrees Fahrenheit for 1 hour or to an internal temperature of 165 degrees Fahrenheit. Refrigerate the tuna overnight to firm so you may home can the next day.
- Separate the tuna into quarters by cutting the meat away from the bones. Pull off and cut out all bones and the fin base, then scrape and cut out all the very dark flesh as it has a very strong flavor and will make the other meat distasteful. Unless you like such a strong flavor – then keep it!
- Cut the quartered tuna crosswise into 2- to 4-inch lengths, depending on whether you are packing into wide-mouth pint and half-pint jars. Pack the tuna tightly into the jars, leaving 1-inch headspace. If you wish to add salt, add 1 teaspoon of salt for each pint and 1/2 teaspoon into each half-pint.
- Do not cover the tun with water. If you chose to precook the tuna, add 1 tablespoon vegetable oil to each pint jar and a 1/2 teaspoon to each half-pint jar, and maintain 1-inch headspace.
- Wipe the rim of each jar with a warm, wet washcloth dipped in vinegar. Place the lid and ring on each jar and hand tighten.
- Add cool water in your pressure canner if raw packing, and hot water if hot packing. Fill your pressure canner with water per the manufacturer requirements, often 3 quarts. Place cool jars in the pressure canner, lock the pressure canner lid, and place canner on high medium-high heat for 15 minutes. Increase heat to high after 15 minutes to allow the canner to get hot enough to vent.
- Let the canner vent for 10 minutes. Close the vent and continue heating to achieve 11 PSI for a dial gauge and 10 PSI for a weighted gauge, or according to your elevation. Process both pints and half-pints for 100 minutes (1 hour and 40 minutes).
- When timer goes off and processing is done, turn off heat and allow the pressure in the canner to naturally get back to zero. This could take upwards of 45 minutes or more. Once canner is at zero PSI, remove canner lid, being sure deflect the steam from your face. Allow canner to sit for 10 minutes undisturbed prior to removing jars from the canner.
- Place jars on a cutting board and allow to cool undisturbed for a minimum of 8 hours or overnight. Once all the lids have sealed, and jars have fully cooled, remove the rings and wash jars in warm soapy water. Store rings to reuse, then label each jar with name and date then store.
Home Canning Tuna
Home Canned Tuna is one of the most satisfying seafood preserves you can add to your pantry. This recipe gives you the choice between raw or hot packing, allowing you to tailor the flavor and texture to your preference. Each jar captures tender, protein-rich tuna without the excess sodium found in store-bought cans. With every batch, you’ll stock shelf-stable seafood ready to transform into tuna salad sandwiches, hearty casseroles, Mediterranean pasta, or simple snacks straight from the jar.
Servings
4
servingsPrep time
30
minutesIngredients
Fresh tuna, skinned and trimmed
Salt (optional: 1 teaspoon per pint, ½ teaspoon per half-pint)
Vegetable oil (optional for hot pack: 1 tablespoon per pint, ½ teaspoon per half-pint)
Instructions
- If raw packing, it is easiest to cut tuna when it is partially frozen. Remove the skin with a sharp knife and scrape the surface lightly to remove blood vessels and discolored flesh. Then proceed to Step 3.
- If hot packing, remove the viscera and wash in cold water. Drain all the blood from the tuna and remove the skin with a sharp knife. Place the cleaned tuna, belly-down on a baking sheet and bake at 350 degrees Fahrenheit for 1 hour or to an internal temperature of 165 degrees Fahrenheit. Refrigerate the tuna overnight to firm so you may home can the next day.
- Separate the tuna into quarters by cutting the meat away from the bones. Pull off and cut out all bones and the fin base, then scrape and cut out all the very dark flesh as it has a very strong flavor and will make the other meat distasteful. Unless you like such a strong flavor – then keep it!
- Cut the quartered tuna crosswise into 2- to 4-inch lengths, depending on whether you are packing into wide-mouth pint and half-pint jars. Pack the tuna tightly into the jars, leaving 1-inch headspace. If you wish to add salt, add 1 teaspoon of salt for each pint and 1/2 teaspoon into each half-pint.
- Do not cover the tun with water. If you chose to precook the tuna, add 1 tablespoon vegetable oil to each pint jar and a 1/2 teaspoon to each half-pint jar, and maintain 1-inch headspace.
- Wipe the rim of each jar with a warm, wet washcloth dipped in vinegar. Place the lid and ring on each jar and hand tighten.
- Add cool water in your pressure canner if raw packing, and hot water if hot packing. Fill your pressure canner with water per the manufacturer requirements, often 3 quarts. Place cool jars in the pressure canner, lock the pressure canner lid, and place canner on high medium-high heat for 15 minutes. Increase heat to high after 15 minutes to allow the canner to get hot enough to vent.
- Let the canner vent for 10 minutes. Close the vent and continue heating to achieve 11 PSI for a dial gauge and 10 PSI for a weighted gauge, or according to your elevation. Process both pints and half-pints for 100 minutes (1 hour and 40 minutes).
- When timer goes off and processing is done, turn off heat and allow the pressure in the canner to naturally get back to zero. This could take upwards of 45 minutes or more. Once canner is at zero PSI, remove canner lid, being sure deflect the steam from your face. Allow canner to sit for 10 minutes undisturbed prior to removing jars from the canner.
- Place jars on a cutting board and allow to cool undisturbed for a minimum of 8 hours or overnight. Once all the lids have sealed, and jars have fully cooled, remove the rings and wash jars in warm soapy water. Store rings to reuse, then label each jar with name and date then store.
Did you make this recipe?
Tag @canningdiva on Instagram and hashtag it with #thecanningdiva
Like this recipe?
Follow @canningdiva on Pinterest
People Often Ask
Q: Should I add liquid to the jars?
A: Adding liquid like water or broth is not required. Like, meat, tuna is dry packed either raw or hot. Tuna releases its own natural juices during processing, creating a flavorful, shelf-stable ready to eat fish in a jar.
Q: Can I raw pack tuna instead of precooking?
A: Yes. Raw packing is common and results in firmer meat. Hot packing adds a slightly richer flavor and softer texture. Both methods are safe when processed correctly.
About the Author:
Diane Devereaux, The Canning Diva®, is a nationally recognized food preservation expert, author, and educator with over 30 years of home canning experience. She’s the author of multiple top-selling canning books and teaches workshops across the U.S. Learn more at TheCanningDiva.com.