
Check this out!

Homemade Salsa Canning Recipe (Safe Water Bath Method)
There’s just something about homemade salsa that makes you feel like summer never has to end. Whether it’s spooned over tacos, paired with eggs, or devoured with a basket of tortilla chips, salsa is a staple in many kitchens—and it’s even better when you preserve it yourself. This homemade salsa canning recipe brings bold, garden-fresh flavor to your pantry with every jar. Made with a vibrant blend of tomatoes, peppers, onions, and spices, this tried-and-true recipe is ideal for water bath canning and perfect for topping tacos, eggs, or enjoying with chips. Whether you’re a seasoned canner or just getting started, Diane’s homemade salsa canning recipe is a staple you’ll return to year after year.
(I sometimes use affiliate links in my content. This will not cost you anything but it helps me offset my costs to keep creating new canning recipes. Thank you for your support.)
By Diane Devereaux | The Canning Diva®
Last updated: August 6, 2025
I created this homemade salsa canning recipe recipe years ago (like almost two decades now) when I was swimming in tomatoes from my garden and wanted a way to bottle up that vibrant flavor. After countless test batches (and many taste testers), this has become my go-to salsa canning recipe. It’s bold but balanced, with just the right amount of heat and acidity to make it safe for water bath canning.
A Brief History of Salsa
Salsa has a rich history that spans cultures and centuries. While it originated in Mesoamerica with the Aztecs and Mayans—who combined tomatoes, chiles, and spices into flavorful condiments—modern salsa has taken on countless variations. From restaurant-style to chunky pico de gallo, there’s a version for every taste. When it comes to canning, though, it’s all about preserving both flavor and food safety. That’s why this tested recipe uses a careful ratio of vegetables to vinegar and lime juice to keep the acidity in check.
Whether you’re new to home canning or have shelves full of jars already, this recipe is a must-have in your seasonal rotation. It’s flexible, flavorful, and perfect for gifting—or hoarding for yourself (no judgment here).
Ways to Use Home Canned Salsa
- Stir into scrambled eggs or omelets for a quick flavor boost
- Serve as a fresh topping for tacos, burritos, or nachos
- Spoon over grilled chicken, steak, or fish as a zesty finishing sauce
- Mix with sour cream or cream cheese for an easy dip
- Add to chili, soup, or stew for added depth and heat – the perfect replacement for traditional canned tomatoes
- Use as a flavorful base for Spanish rice or Mexican-style casseroles
- Blend with avocado for a quick guacamole twist
- Spread onto sandwiches, burgers, or wraps in place of mayo
Tomato Prep – Blanching Tomatoes
Traditional Canning tomatoes (aka Beefsteak) are very seedy and have lots of juice. Be sure to remove excess juice prior to measuring the chopped tomatoes. Roma tomatoes are considered the best salsa tomato; however, I have used both with great results.
Blanching your Beefsteak or heirloom tomatoes prior to chopping makes skin removal so much easier. After blanching, letting them rest in a colander in the sink helps remove excess water. I’ll share what works best for me:
- Core the top of the tomato, then flip the tomato over and cut a decent size “X” on its bottom.
- Fill a metal canning basket full of cored/x-ed tomatoes.
- Gently lower the basket of tomatoes into a pot of boiling water, completely submerging the tomatoes.
- Set timer for 1 minute. When the skin near the “x” begins to lift, your tomatoes are ready to be removed from the boiling water
- Using a slotted spoon, carefully remove the hot tomatoes from the boiling water and plunge them into a bowl of ice cold water resting in the sink. Feel free to add ice cubes periodically to keep the water cold.
- Let the tomatoes sit in the cold water for 1 minute, then begin removing the skins.
- Starting with one corner of the “x” you created at its base, pull the skin off the tomato with ease. You’ll be surprised how easily the skins slip off into your hands.
- Place the peeled tomatoes in a colander in the sink or atop a large bowl and let them rest for 10 minutes to remove excess liquid before proceeding with chopping.
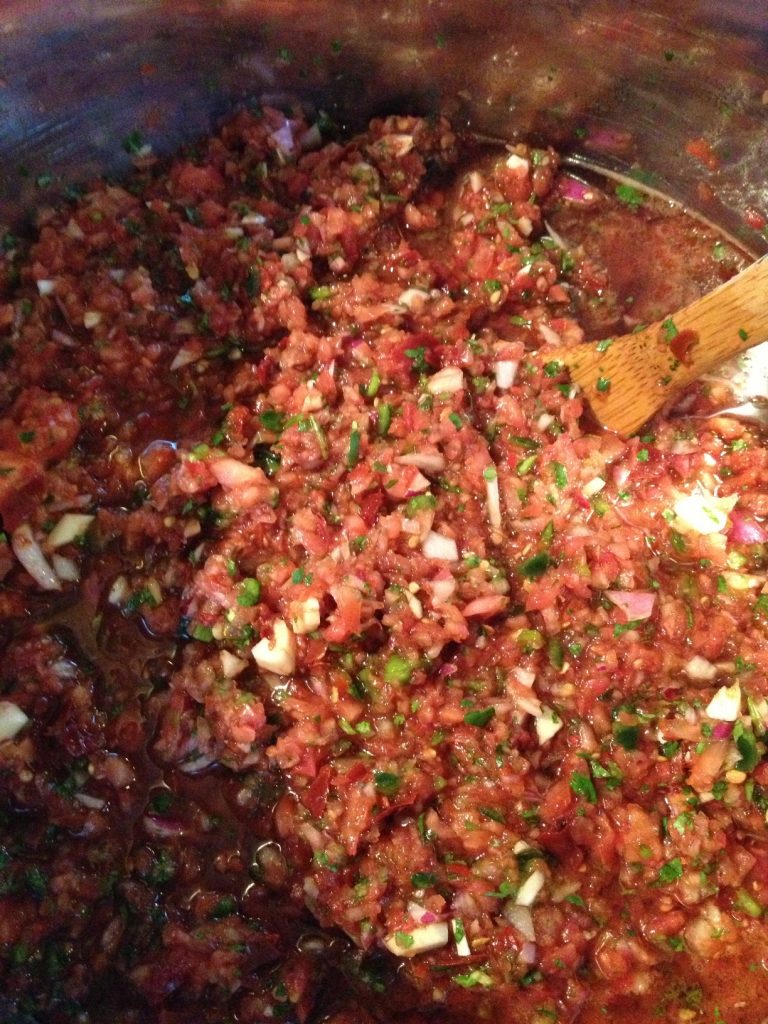
My family does not prefer to eat “chunky” salsa. Me? The chunkier the better! I will often make a batch of extra-chunky salsa for myself, and use a food processor to finely chop the tomatoes, jalapenos, bell pepper, onions and cilantro for others. I truly enjoy eating and using it both ways. Simply pulse the vegetables in your food processer for a more consistent texture, being sure not to puree or you will wind up with soup!
Homemade Salsa Canning Recipe
This authentic homemade salsa canning recipe combines fresh tomatoes, onions, peppers, and spices into a flavorful preserve perfect for year-round enjoyment. Safe for water bath canning, it’s a pantry staple you’ll want to make every tomato season.
Makes approx. 6 quarts or 12 pints
Ingredients
- 8 cups of peeled, cored and finely chopped fresh tomatoes
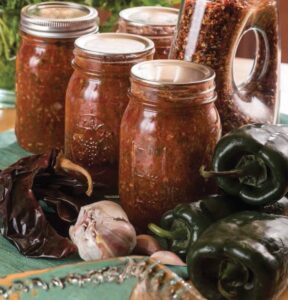
- 1 to 2 cups of seeded and finely chopped jalapeno peppers (based on your heat preference)
- 1 cup finely chopped green bell pepper
- 2 cups finely chopped onion
- 8 cloves of garlic, minced
- ½ to 1 cup finely chopped fresh cilantro
- 1 tbsp. sea salt
- ½ cup apple cider vinegar
- ½ cup fresh lime juice
Instructions
- After preparing and chopping each fresh ingredient, combine the tomatoes, jalapenos, green bell peppers, onions, and garlic in a large stainless steel stock pot and bring to a boil.
- Reduce heat and let simmer for 10 minutes, stirring occasionally to avoid scorching the salsa. Add the cilantro, salt, vinegar and lime juice and return to a simmer for 5 minutes.
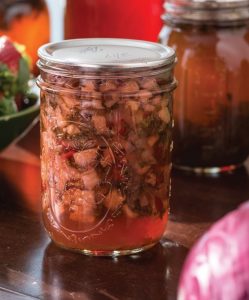
- Using a funnel, ladle hot salsa into prepared jars being sure to leave ½-inch of headspace. Remove any trapped air pockets and add additional salsa if necessary to maintain the ½-inch headspace.
- Wipe each rim with a washcloth dipped in vinegar. Place the lid and ring on each jar and hand tighten.
- Process in a hot water bath; 15 minutes for pints and 25 minutes for quarts. Be sure the water level fully covers the top of the jar.
- Remember, processing time does NOT begin until the water is at a full rolling boiling. Adjust your processing time if you live in a higher altitude. The thinner the air, the longer the boil time.
Happy Canning!
xo
Diane, The Canning Diva
Homemade Salsa Canning Recipe
This authentic salsa canning recipe combines fresh tomatoes, onions, peppers, and spices into a flavorful preserve perfect for year-round enjoyment. Safe for water bath canning, it’s a pantry staple you’ll want to make every tomato season.
Servings
6 quarts or 12 pints
servingsPrep time
30
minutesIngredients
8 cups 8 peeled, cored and finely chopped fresh tomatoes
1 1 to 2 cups of seeded and finely chopped jalapeno peppers
1 cup 1 finely chopped green bell pepper
2 cups 2 finely chopped onion
8 cloves 8 garlic, minced
½ to 1 cup finely chopped fresh cilantro
1 tbsp. 1 sea salt
½ cup apple cider vinegar
½ cup fresh lime juice
Instructions
- After preparing and chopping each fresh ingredient, combine the tomatoes, jalapenos, green bell peppers, onions, and garlic in a large stainless steel stock pot and bring to a boil.
- Reduce heat and let simmer for 10 minutes, stirring occasionally to avoid scorching the salsa. Add the cilantro, salt, vinegar and lime juice and return to a simmer for 5 minutes.
- Using a funnel, ladle hot salsa into prepared jars being sure to leave ½-inch of headspace. Remove any trapped air pockets and add additional salsa if necessary to maintain the ½-inch headspace.
- Wipe each rim with a washcloth dipped in vinegar. Place the lid and ring on each jar and hand tighten.
- Process in a hot water bath; 15 minutes for pints and 25 minutes for quarts. Be sure the water level fully covers the top of the jar.
- Remember, processing time does NOT begin until the water is at a full rolling boiling. Adjust your processing time if you live in a higher altitude. The thinner the air, the longer the boil time.
Notes
- My family does not prefer to eat “chunky” salsa. Me? The chunkier the better! I will often make a batch of extra-chunky salsa for myself, and use a food processor to finely chop the tomatoes, jalapenos, bell pepper, onions and cilantro for others. I truly enjoy eating and using it both ways. Simply pulse the vegetables in your food processer for a more consistent texture, being sure not to puree or you will wind up with soup!
Did you make this recipe?
Tag @canningdiva on Instagram and hashtag it with #thecanningdiva
Like this recipe?
Follow @canningdiva on Pinterest
People Often Ask
Q: Can I reduce the vinegar or lime juice in this salsa recipe?
A: No, you should never reduce the acid in a salsa canning recipe. The vinegar and lime juice ensures the pH is low enough for safe water bath canning at the specified processing time. Reducing the acid could create unsafe conditions for bacterial growth if the processing time is not adequately increased to compensate for the reduction in acid.
Q: Can I use lemon juice instead of lime juice or vinegar?
A: You can substitute bottled lemon juice for bottled lime juice. Lemon juice as a muted flavor compared to the lime juice, however it will enhance the overall acidity just the same. I prefer lime juice in my salsa for its zing of flavor.
Q: Can I add corn, black beans, or mango to this salsa?
A: If you wish to make black bean and corn salsa, click here for my tested canning recipe. If you prefer to make a fruit salsa, like mango, pineapple or strawberry salsa, seek the specific canning recipe.
Q: How spicy is this salsa, and can I adjust the heat?
A: This recipe, using 2 cups of chopped jalapenos, has a medium kick. You can reduce the heat by using fewer jalapenos or by removing their seeds and membranes prior to chopping them. If you wish to create a salsa with less heat, use 1/2 cup to 1 cup of chopped jalapenos, giving it a more mild spicy flavor.
About the Author:
Diane Devereaux, The Canning Diva®, is a nationally recognized food preservation expert, author, and educator with over 30 years of home canning experience. She’s the author of multiple top-selling canning books and teaches workshops across the U.S. Learn more at TheCanningDiva.com.